
Step by step: how to fill out the ESTA form
To travel to the United States, you must obtain an ESTA, an electronic travel authorization. Here's how to do it in 9 steps.
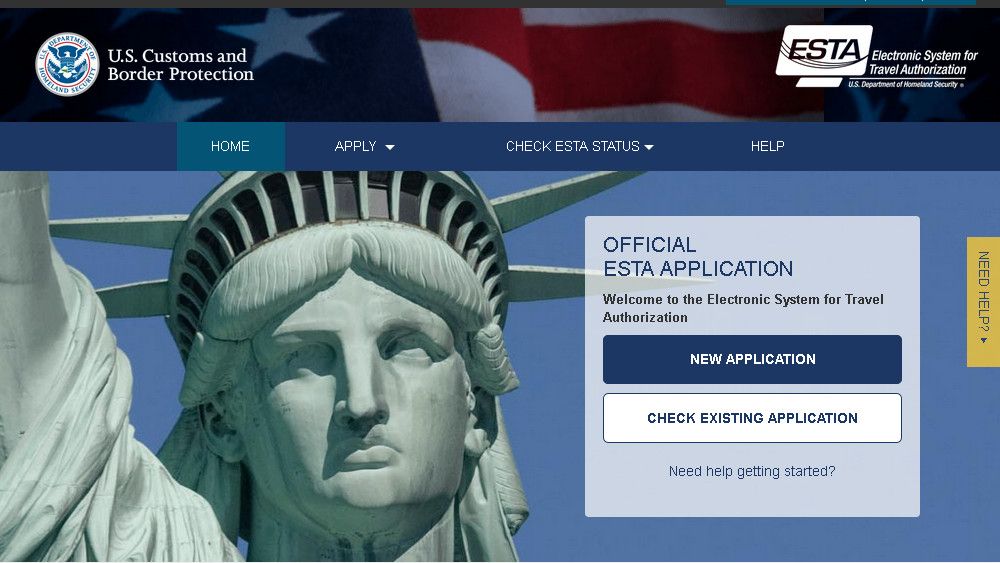
Before you fly, you must apply for travel authorization called ESTA, at least 72 hours before your departure to enter the United States. This requirement has existed since January 2009, but the ESTA website recently redesigned its interface to work better on smartphones and tablets. Here’s how to complete your application in 9 steps:
1/ Go to the official ESTA website

- To submit your ESTA application, visit the official government website for U.S. Customs and Border Protection.
- Make sure you’re on the official site. If you search “ESTA” on Google, you may find third-party websites offering to submit your application for you—but they charge far more than the official ESTA fee of $40 (as of September 30, 2025). Avoid these sites and apply only on the official government website.
- The official ESTA website offers multiple languages. Select your preferred language from the dropdown menu in the top right corner of the page.
2/ Access the ESTA form

- To access the ESTA form and enter your information, click “New Application”. You’ll then see the eligibility requirements for ESTA.
- If you’re a citizen of a country in the Visa Waiver Program and plan to stay in the United States for 90 days or less for tourism or business, click “Individual Application”.
- A security notice will appear explaining the legal framework for collecting your information. Click “Confirm and Continue”.
3/ Accept the legal terms

- The next screen, titled “Disclaimer”, covers the legal terms of ESTA, including the Visa Waiver Program Improvement and Terrorist Travel Prevention Act that established ESTA in 2009.
- These are legal paragraphs you must accept to apply for ESTA. You have no choice but to click “Yes, I have read and understood the information and accept the terms” for each one.
- Once you’ve clicked “Yes”, click the “Next” button.
4/ Upload your passport and take a photo
- There’s a new feature on the ESTA website as of 2025! After accepting the terms, the site will ask you to upload a copy of your passport. You’ll need a scan of your passport on your computer or a high-quality photo. Click “Upload Your Passport”. You can also take a photo of your passport directly with your phone if you’re using the ESTA app on your smartphone.
- Next, you’ll need to submit a portrait photo of yourself, like a selfie. You have several options: upload an existing photo from your computer, or take a photo directly using your computer’s camera. You can also use your phone’s camera if you’re using the ESTA app on your mobile device. If so, make sure you download the official app.
5/ Confirm your personal information

- The next page shows the first section of the ESTA form, covering “Applicant Information”—your personal details.
- Answer the questions and provide your name, date of birth, and city of birth. You’ll also need to enter your passport number, country of issue, date of issue, and expiration date.
- You’ll also be asked whether you hold or have held any other nationality.
- Below that, the form asks if you’re a member of the CBP Global Entry program. If you’re a citizen of France, Belgium, or Switzerland, answer “No”, as these countries are not eligible for this program.
- Continue by providing your parents’ names, your contact information, and details about your occupation and employer.
6/ Provide your U.S. contact information

- The next form asks whether you’ll be in transit through the United States or staying there. If you plan to stay in the U.S., provide your hotel address.
- Whether you’re in transit or visiting for vacation, you must provide the name and contact information of an emergency contact. This is someone U.S. authorities can reach if needed. Then click “Next”.
7/ Answer the eligibility questions

- The next page presents “Eligibility Questions”. You’ll be asked questions like whether you intend to engage in terrorist activities, espionage, sabotage, or genocide.
- Skim through these questions quickly. To obtain ESTA, you must answer “No” to each one. If you accidentally click “Yes”, an alert will appear on screen directing you to the help section. If it was a mistake, change your answer to “No”.
- IMPORTANT: A recent addition asks whether you’ve traveled to Iraq, Syria, Iran, Sudan, Libya, Somalia, or Yemen since March 1, 2011. If you have, you cannot get ESTA and must apply for a visa to enter the United States.
- Once you’ve checked all the boxes, check the “Disclaimer” box. Again, you must accept this to proceed. Then click “Next”.
8/ Review your information

- The next page lets you review your answers and verify everything is correct. For each section, click “Confirm and Continue”. A “Reviewed” checkmark will appear automatically to show you’ve confirmed that section.
- If you spot an error, click the “Edit” button on the right side of the screen. You can then correct the information. Click “Refresh” to apply the changes.
- Finally, you’ll answer a few verification questions: your passport number, the country that issued it, your last name, and your date of birth. Then click “Next”.
9/ Pay the fee

- You’re almost done! To finalize your ESTA application, you need to pay the $40 processing fee.
- You’ll need to click a “Disclaimer” button confirming you won’t request a refund of the fee.
- You can pay the $40 ESTA fee via PayPal or credit card. The site accepts all major cards, including Visa, MasterCard, and American Express.
10/ Print your ESTA

- Once payment is processed, you’ll see the magic words: “Authorization Approved”.
- Print the page right away so you can show your ESTA to the immigration officer if asked. This is rare, but it’s good to have all your documents ready.
- If you don’t have time to print immediately, you can return to the official website later. Click “Check Existing Application” and then “Check Individual Status”. You can then find your ESTA application and print it. Now go enjoy Manhattan!
How to fill out your ESTA
Watch our video for a step-by-step guide to completing your ESTA application.

Questions?
Have questions about ESTA? Feel free to ask on the New York Forum. Our team and forum members are happy to help! 🙂